PRETTY PLANT POTS
Recommended age: 3-5 years
Safety first: ensure plastic plant pots are used and this is supervised.
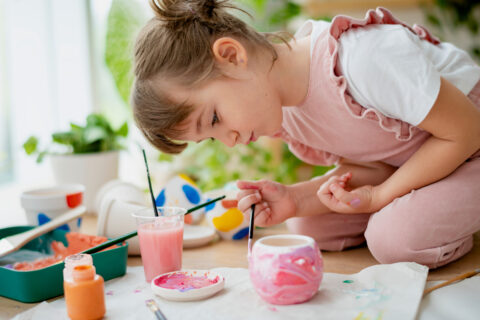
Bring the outdoors in by suggesting children decorate their very own plastic plant pot. Ask your child to think of resources they will need: for instance, they might use paint or sticking materials which could be natural items such as grass, leaves and foil.
As your child starts to decorate, encourage them to talk through the process of what they are creating. You could ask them what they are going to use next, or how they are going to use the foil to decorate the pot.
While the pot is drying, look at parts of a plant in a book or on the computer together. Use keywords such as stem, petals, pollen and roots. Once the pot is dry, invite your child to plant a flower or seeds in it and you will be able to watch it grow.
Growing and tending to plants and flowers, or even just examining leaves and soil, helps children to understand life cycles and where food comes from.
CLING FILM PRINTING
Recommended age: 2-3 years
Safety first: remove all cling film from children’s reach after this activity.
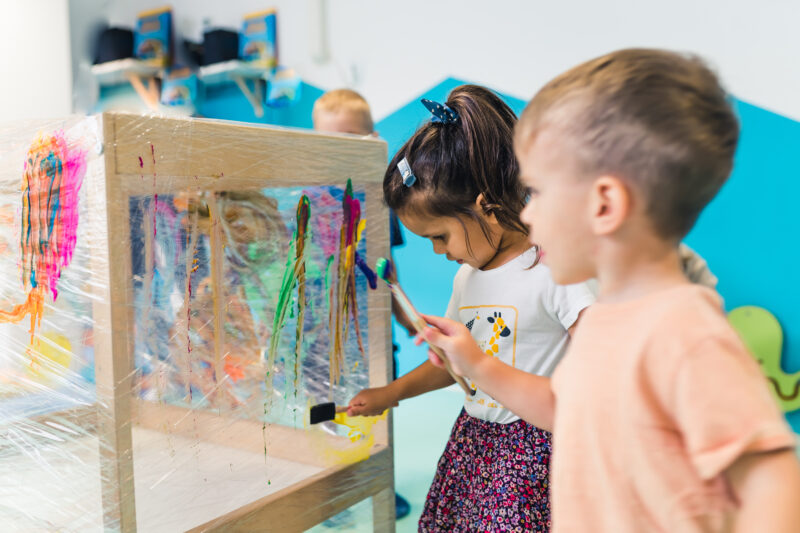
Get messy with your child while making patterns. First, cover a surface with a plastic tablecloth or newspaper taped to the table. Next, pull out a strip of clingfilm and, using masking tape, secure this to the table covering.
Encourage children to squeeze a small amount of different coloured paints onto the clingfilm. Show them how they can use their fingers (or brushes or sponges) to move the paint around and make different patterns.
When they are happy with the patterns they have made, show them how they can press a piece of paper onto the paint and make an imprint of their picture. Talk about the picture together, commenting on the different patterns you can see. This activity can help children with fine motor skills, such as gaining strength and dexterity in their hands and fingers, before being required to hold a pencil correctly.
SPINNERS
Recommended age: 3-5 years
Safety first:
don’t leave children unattended with scissors. Ensure this activity is
supervised and packed away when complete due to the length of the
string.
Develop scissor skills and creativity as children create their own
spinner. All you need are a large piece of cardboard, some string,
scissors and some colouring pens. First, cut out a large circle from the
cardboard. If you have child-safe scissors, children may be able to do
this for themselves with supervision. Suggest they draw a circle and
then follow the line to cut it out.
Now, suggest your child decorates both sides of the cardboard circle.
They can use any decorative resources you have to hand, such as
colouring pens or crayons. Ask them questions about their designs and
give them prompts and ideas.
Next, poke two holes in the centre of the cardboard circle. Thread
the string through the holes and tie a knot (the string will need to be
around 28 inches long). You now should have the cardboard circle in the
middle of the string, so you have lengths of string to hold each side of
the circle.
The spinner is now ready! Get your child to hold a piece of string in
each hand with the circle in the middle and go in circles to get the
string twisted. Now you pull, relax, pull, relax as the circle spins
around and makes a humming sound.
Children make millions of new brain connections, or synapses as they are
called, in early childhood as they make sense of the world.
Opportunities to be creative helps link all the different parts of their
brains and bodies.
SHAKE AND WRITE
Recommended age: 3-5 years
Safety first: make sure the space is clear and free of obstacles, and that paper is securely taped to the floor or table.
This activity supports your child's early handwriting skills.
Prepare by finding a song or some music that you and your child enjoy
listening to. Then securely tape a large piece of paper to the table or
floor and find some crayons or chalk.
Next, in a clear space, play the music and dance together. Try making
different shapes with your arms, for example moving them up and down in
opposite directions, or side to side, or round in a circle. To master
the fine motor movements needed for forming letter shapes, your child
needs to experience making them on a gross motor scale and dancing is a
great way to do this.
When the music finishes, sit with your child in the place you laid the
paper out. You should both have a crayon, pen or pencil in each hand.
Listen to the same song again, this time making shapes with your hands
on the paper. Try making similar shapes to the ones you did when you
were dancing.
There is no right or wrong way for your child to complete this activity.
It’s all about being creative and practising mark-making, while
enjoying time together listening to music. Try different types of music:
fast rock, slow classical, or folk music with a strong beat.
Afterwards, talk with your child about the patterns you have made on the
paper. This helps children to make a connection between print and
drawing within the environment and understand that symbols carry
meaning.
Visit busybeeschildcare.co.uk


